Reese Peanut Butter Cup Poke Cake
This post may contain affiliate links. For more information, read my disclosure policy here.


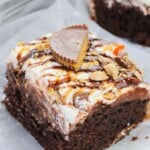


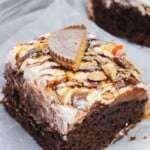
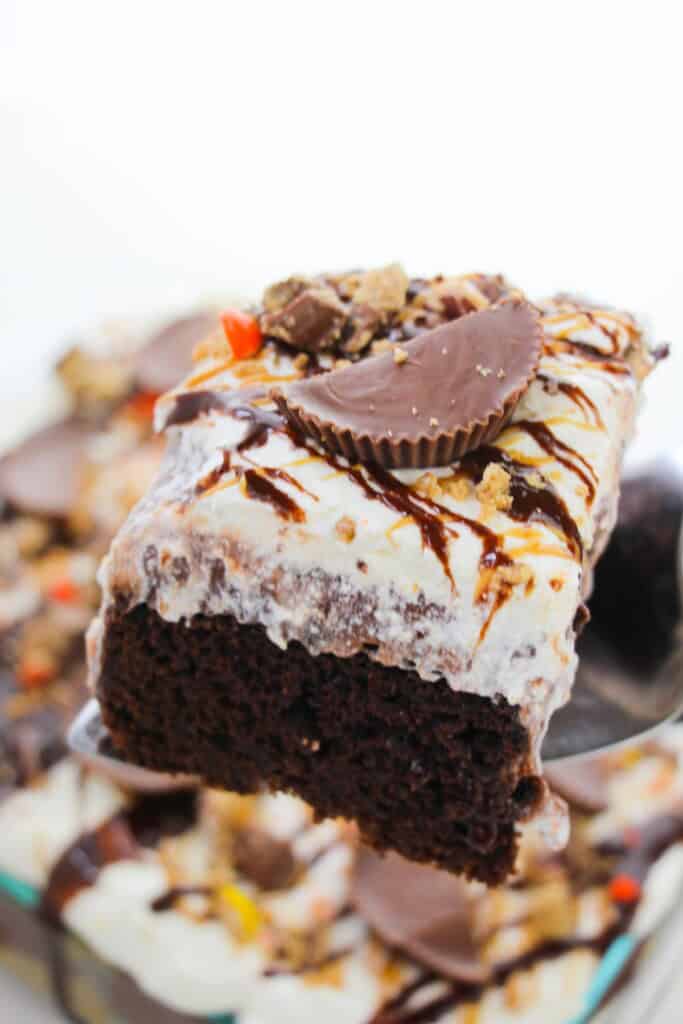
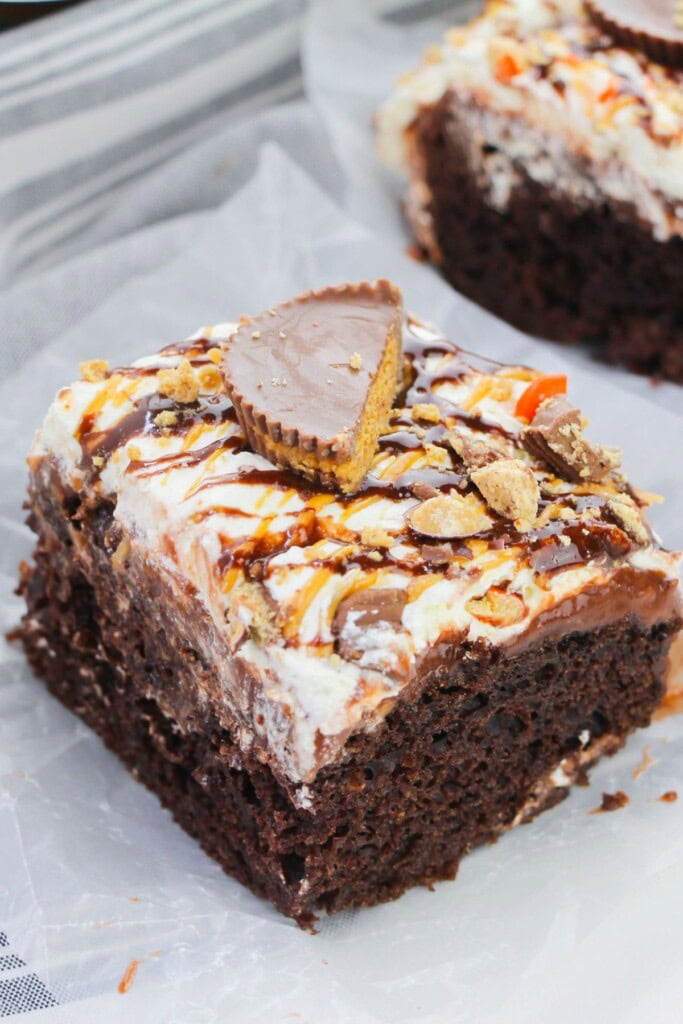
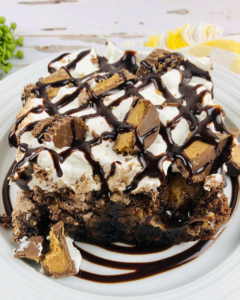
This Chocolate Peanut Butter Poke Cake is a true crowd pleaser. Moist chocolate cake becomes the base for luscious peanut butter that melts into every pocket and crevice. Then topped with Reese’s Cups and Pieces on top. Each bite is rich, creamy, and unapologetically fun. It’s the kind of dessert that makes people gather around the table a little faster and linger a little longer.
Poke cakes are my go to dessert when I want something impressive and delicious. Here are a few more that I truly love: My coconut Pina Colada Poke Cake and my Oreo Poke Cake.
Why this Peanut Butter Cup Cake Recipe Works
This peanut butter cup poke cake is a treat that my whole family loves. This is one of my favorite desserts for holidays and birthday parties. It is perfect for sharing and guaranteed to bring smiles around the table.
- Irresistible Flavor Combination: It’s hard to beat chocolate and peanut butter, and this cake delivers on that classic pairing in spades. The richness of the chocolate cake, the gooey peanut butter filling, and the creamy frosting all work in harmony.
- Moist and Decadent Texture: The “poke” technique ensures that every bite of the cake is infused with a rich, moist filling, preventing any dryness often found in regular cakes. It creates a delightful surprise in each forkful.
- Satisfying and Indulgent: This isn’t a light dessert; it’s pure comfort food that hits all the right notes for a sweet craving. It’s truly a treat.
- Visually Appealing: With the distinct layers and the generous topping of Reese’s cups, this cake looks as good as it tastes, making it a showstopper for parties and gatherings.
- Easy to Make: Despite its impressive appearance and taste, most poke cake recipes are quite straightforward, often starting with a boxed cake mix, making them accessible even for novice bakers.
- Crowd-Pleaser: It’s a dessert that appeals to almost everyone, from kids to adults, making it a reliable choice for any event.
What Should I use to Poke the Holes?

I love using the round handle of a wooden spoon to poke holes. It makes the perfect size whole to
Fun Fact
Poke cakes were originally created in the 1970s by Jell-O as a way to boost sales of their gelatin products. The idea was to bake a cake, poke holes in it, and pour colorful Jell-O over the top, creating a vibrant, moist, and visually appealing dessert.
Peanut Butter Poke Cake Ingredient Notes
This Reese’s poke cake is one of the most wonderful dessert for peanut butter lovers.
Get the full printable recipe with specific measurements and directions in the recipe card below.

- Chocolate Cake: Use your favorite chocolate cake mix and make cake mix according the directions on the back of the box to bake. You can use a homemade chocolate cake recipe if you prefer.
- Chocolate Pudding: I make the box of chocolate pudding using the directions on the back of the box.
- Candy: The candy is used for decorating. I use Reese’s pieces and also Reese’s peanut butter cups for the top of the cake.
Variations and Substitutions to Love Chocolate Poke Cake
It is easy to enhance the creamy peanut butter flavor for this peanut butter chocolate poke cake recipe.
- Filling Variations for the Peanut Butter Topping:
- Sweetened Condensed Milk: A common base for many poke cakes, providing intense sweetness and moisture.
- Hot Fudge: Can be drizzled into the holes for an extra layer of flavor.
- Nutella: For a chocolate-hazelnut twist.
- Peanut Butter Pudding: A sweet way to make this cake.
- Frosting Fun:
- Peanut Butter Buttercream: For a richer, homemade frosting, cream butter, powdered sugar, and peanut butter.
- Cream Cheese Frosting: A tangy cream cheese frosting can balance the sweetness.
- Chocolate Ganache/Frosting: Top with a rich chocolate ganache or a simple chocolate buttercream.
- Topping Twists:
- Peanut Butter Chips: For extra color and crunch.
- Chopped Nuts: Chopped Peanuts, pecans, or walnuts for added texture.
- Chocolate Drizzle: A simple melted chocolate drizzle over the top. Chocolate sauce or chocolate shavings or mini chocolate chips are also perfect for this great recipe.
- Dietary Adjustments:
- Gluten-Free: Use a gluten free chocolate cake mix for this sheet cake. Ensure other ingredients (pudding, toppings) are also GF.
- Dairy-Free: Use a dairy-free cake mix (some are naturally DF), almond or oat milk for the pudding/frosting, and dairy-free whipped topping. Check hot fudge/Reese’s for dairy content.
Special Equipment Needed for this Chocolate Cake Recipe
- Wooden Spoon: I use the end of a wooden spoon but you can also use a straw, chop stick or skewer.
How to Make Chocolate Peanut Butter Poke Cake
If you love chocolate flavor and peanut butter than this cake is a keeper. I have never had a poke cake that I did not love and this one is next level.
Get the full printable recipe with specific measurements and directions in the recipe card below.
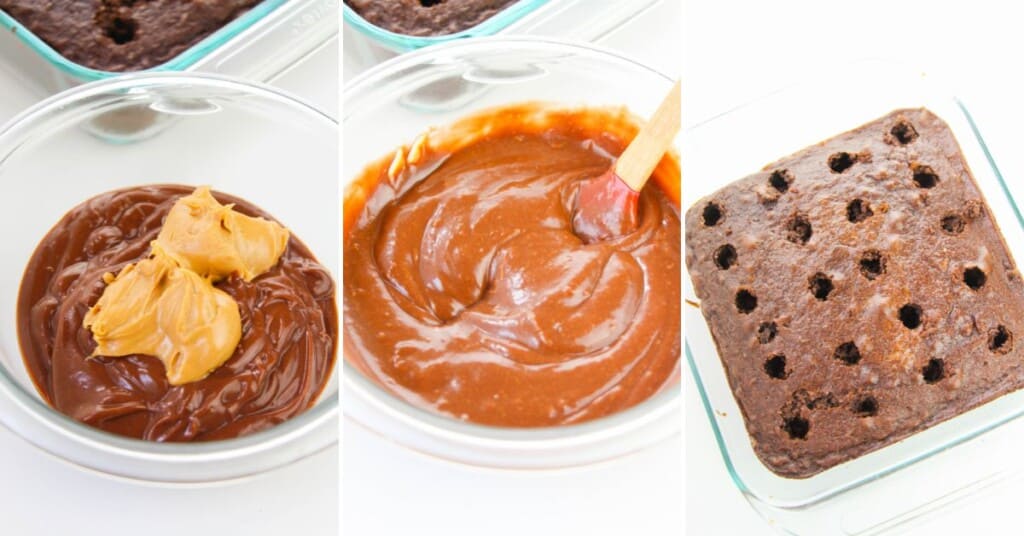
- Bake the Cake & Prep the Filling: Bake the boxed chocolate cake according to package directions. While it’s baking, make the chocolate pudding and stir in ½ cup peanut butter. Set aside.
- Melt Peanut Butter Mixture: Microwave the remaining peanut butter and chocolate frosting for 20 seconds each, stirring until smooth.
- Poke Holes in the Cake & Pour Over Cake: After baking, poke holes across the warm cake with a wooden spoon handle or chopstick. Drizzle on the melted peanut butter and frosting, then pour over the chocolate-peanut butter pudding. Smooth into an even layer.
- Chill & Garnish: Refrigerate slightly, then top with Cool Whip. Finish with more melted peanut butter and frosting, plus chopped Reese’s Cups and Reese’s Pieces. Let it set before slicing.

Prep Ahead Suggestions for Peanut Butter Chocolate Poke Cake
Reese’s Peanut Butter Cup Poke Cake is an excellent make-ahead dessert!
- Bake the Cake: Bake the Cake and poke the holes. Let it cool completely.
- Prepare Filling: Make the pudding/hot fudge/condensed milk mixture.
- Assemble and Chill (Highly Recommended): Pour the filling over the poked cake, then cover and refrigerate for at least 2-4 hours, or preferably overnight. This is the ideal make-ahead stage as it allows the flavors to meld and the cake to become perfectly moist.
- Prepare Frosting/Topping Separately: You can make homemade buttercream frosting a day or two in advance and store it in the fridge. Chop the Reese’s cups.
- Frost Just Before Serving (or a few hours ahead): For the freshest appearance, spread the frosting and add the Reese’s topping 1-2 hours before serving the peanut butter poke cake recipe. This prevents the candy from softening too much or the frosting from drying out.
Alternate Cooking Methods to Make Peanut Butter Poke Cake
The core of a poke cake involves baking the cake. Alternate methods mainly apply to the cake itself:
- Layer Cake (More Advanced): While not typical for a “poke” cake, you could bake two round cake layer cake pan, poke and fill each layer, then stack them with a layer of frosting between. This creates a taller, more formal dessert.
- Cupcakes: You can easily adapt a poke cake recipe for cupcakes. Bake cupcakes, poke holes, add filling, frost, and top. Baking time will be significantly shorter (around 18-22 minutes).
How to Store, Freeze and Use Leftover Peanut Butter Poke Cake Recipe
After taking the time to make this peanut butter poke cake recipe, you will want to make sure that you store it correctly.
- Storing: Cover the cake tightly with plastic wrap or transfer slices to an airtight container.
- It will keep well for 3-5 days in the refrigerator. The flavor often improves on day 2 as the filling fully permeates the cake.
- Freezer: Yes, poke cakes freeze surprisingly well!
- Whole Cake: Once completely chilled and set, you can wrap the entire cake (or larger portions) tightly in plastic wrap, then an additional layer of aluminum foil. Freeze for up to 1-2 months. Individual Slices: For convenience, cut the cake into individual servings. Wrap each slice tightly in plastic wrap, then place in a freezer-safe bag or container. This allows for easy thawing of single portions. Freeze for up to 1-2 months.
- Using Leftover Peanut Butter Cup Poke Cake:
- Dessert in a Glass: Crumble leftover cake into a parfait glass. Layer with extra whipped cream, hot fudge, or peanut butter sauce, and mini Reese’s cups for a deconstructed trifle.
- Ice Cream Topping: Break up chilled leftover cake into pieces and use it as a decadent topping for vanilla or chocolate ice cream.
- Cake Pops/Balls: If the cake becomes a bit too soft or less appealing on its own, crumble it up, mix with a little extra frosting or cream cheese, roll into balls, dip in melted chocolate, and sprinkle with more chopped Reese’s.
Common Questions About This Peanut Butter Dessert Recipe
Poke the holes while the cake is still warm (but not hot from the oven), usually 10-15 minutes after it comes out. This allows the cake to be pliable enough to absorb the filling effectively.
This can happen if too much filling is used, the holes are too close together, or the cake is not chilled long enough. Ensure you follow the recipe’s quantities for the filling and allow ample chilling time.
It’s generally recommended to use creamy, smooth peanut butter (like Jif or Skippy) for the filling and frosting. Natural peanut butter can sometimes separate or have a different consistency that doesn’t blend as well, or result in a greasier texture.
Expert Tips to Make the Peanut Butter Poke Cake
Here are a few key elements to remember when you are making the peanut butter cup poke cake.
- Poke Consistently: Aim for relatively even spacing (about 1 inch apart) and depth with your holes. This ensures the filling distributes well throughout the cake.
- Don’t Rush the Chill Time: This is perhaps the most important tip. The chilling period is non-negotiable for a perfect poke cake. It allows the filling to fully absorb and set, creating that signature moist, tender texture.
- Soften Peanut Butter: If your peanut butter is very stiff, microwave it for 10-15 seconds to soften it slightly before mixing it into the filling or frosting. This makes it easier to combine smoothly.
- Use Quality Ingredients: While a boxed mix is fine, using good quality hot fudge, peanut butter, and fresh Reese’s cups will make a noticeable difference in flavor.
- Garnish Right Before Serving (for best appearance): If your recipe calls for Reese’s Pieces or specific chocolate drizzles on top of the frosting, consider adding them closer to serving time. Reese’s Pieces’ candy coating can sometimes “bleed” color onto white frostings if left for extended periods, and drizzles look freshest when newly applied.
- Level Your Cake: A level cake bakes and chills more evenly. If your cake has a dome, you can gently trim it flat once cooled.
- Serve Cold/Cool: This cake is best enjoyed straight from the refrigerator or after sitting out for just 15-30 minutes. The cold temperature enhances the fudgy, creamy texture.
- More Poke Cake Recipes:Christmas Poke Cake, 21 Chocolate Poke Cake Recipes
More Recipes You Might Like


Reese Peanut Butter Cup Poke Cake
Equipment
- 9 x 13-inch baking dish
- Wooden spoon handle or chopstick
- Offset Spatula
- Microwave-safe bowls
Ingredients
- Cake
- 15.25 ounces Chocolate cake mix, 1 box
- Ingredients called for on the cake mix package
- Filling
- 3.4 ounces Instant chocolate pudding mix, 1 box
- Ingredients called for on the pudding mix package
- ¾ cup Creamy peanut butter
- Topping
- ¼ cup Chocolate frosting
- 8 ounces Cool Whip whipped topping, thawed
- Garnish
- 6 Reese’s Peanut Butter Cups, chopped
- ½ cup Reese’s Pieces candies
Instructions
- Preheat the oven according to the cake mix package directions. Prepare and bake the cake in a 9 x 13-inch baking dish according to the package instructions.
- While the cake bakes, prepare the pudding according to the package directions. Stir in ½ cup of the peanut butter until smooth. Set aside.
- Place the remaining ¼ cup peanut butter in a microwave-safe bowl and heat for about 20 seconds. Stir until smooth.
- Place the chocolate frosting in a separate microwave-safe bowl and heat for about 20 seconds. Stir until smooth and pourable.
- Remove the cake from the oven and allow it to cool for 5 minutes.
- Using the handle of a wooden spoon or a chopstick, poke holes all over the cake, spacing them about 1 inch apart.
- Drizzle the melted peanut butter and chocolate frosting over the cake.
- Pour the peanut butter pudding mixture over the cake and spread it evenly, gently pressing it into the holes.
- Refrigerate the cake for 30 minutes to allow the filling to settle.
- Spread the whipped topping evenly over the chilled cake.
- Sprinkle the chopped Reese’s Peanut Butter Cups and Reese’s Pieces over the top.
- Refrigerate for at least 30 minutes before slicing and serving.
Christina’s Notes
- Poke the holes evenly across the cake so the filling is distributed throughout each slice.
- Room-temperature whipped topping spreads more easily and creates a smoother finish.
- This cake can be assembled up to 24 hours in advance. Add the candy garnish shortly before serving for the best texture.
- Creamy peanut butter works best for a smooth filling and drizzle.
- Store covered in the refrigerator for up to 4 days.
- Freeze individual slices in airtight containers for up to 2 months. Thaw overnight in the refrigerator before serving.
For more helpful information about this recipe, such as variations, substitutions and other pro-tips, scroll up on the page.