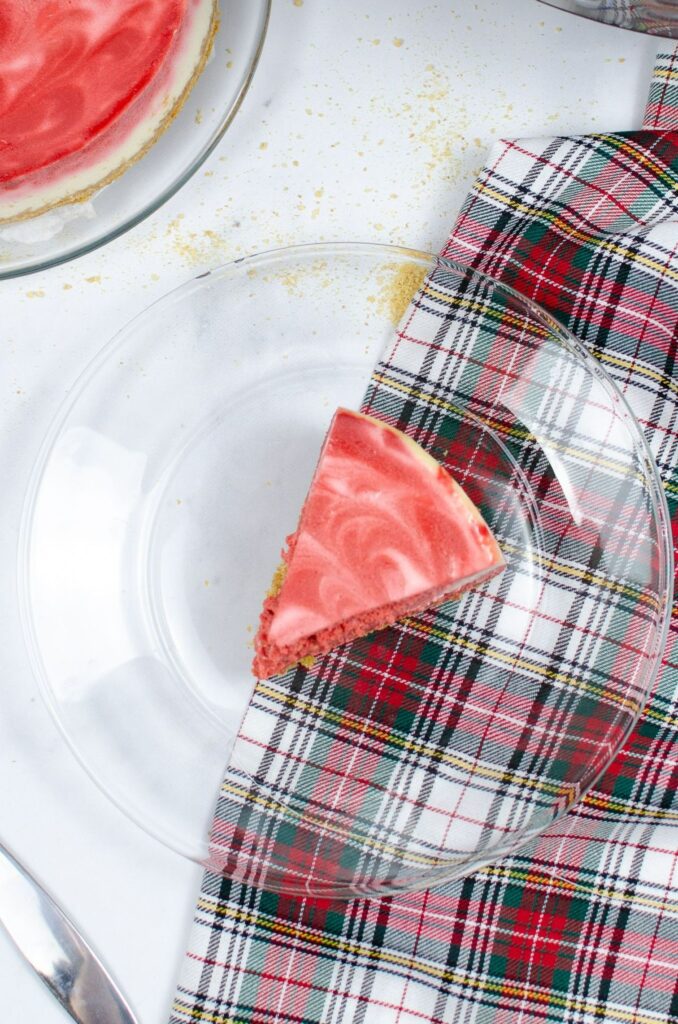
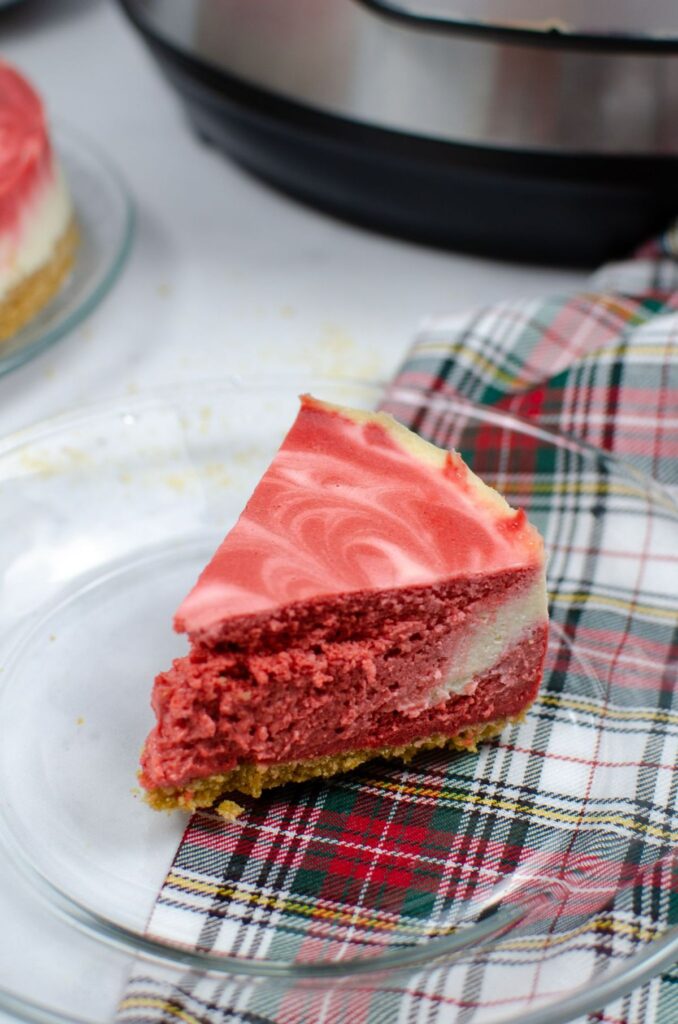
This Red Velvet Instant Pot Cheesecake is the ultimate red velvet cake cheesecake, not only because of the velvety texture but also because it is made so easily in the instant pot.
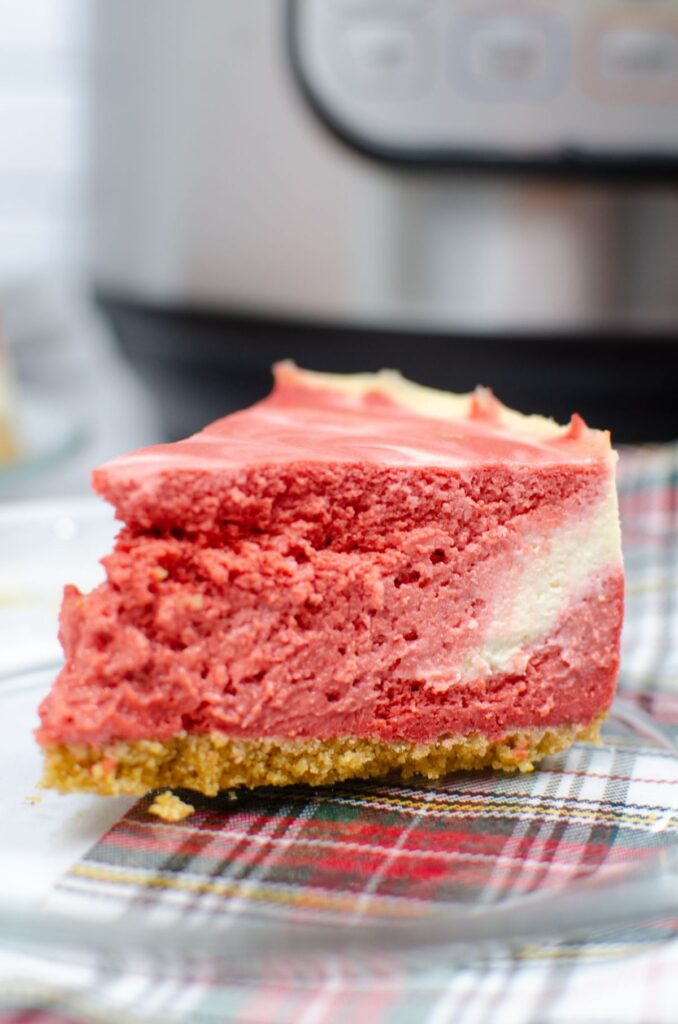
Instant Pot Cheesecake is so lush, decadent and sweet. It is the perfect dessert to make on Valentine’s Day or any time you want to serve something show stoppingly good, yet so easy for you to make. Cheesecake has been around for over 4000 years! Find out more here.
MORE CAKE RECIPES YOU MIGHT LIKE
Twix Cake Recipe | Pumpkin Dump Cake Recipes |Instant Pot Apple Spice Cake
What We Love About Instant Pot Cheesecake Recipes
Using the instant pot makes this cake so easy to make, and the red velvet cheesecake recipe is particular nice to serve when you want to impress your guests. It is spectacular to look at and wonderful to eat.
- 15 Minute Prep: This cheesecake is so quick and easy to make.
- Easy Ingredients: All found in pantry or fridge.
- Family Friendly: Almost everyone loves cheesecake, so it is always a hit.
Ingredient Notes
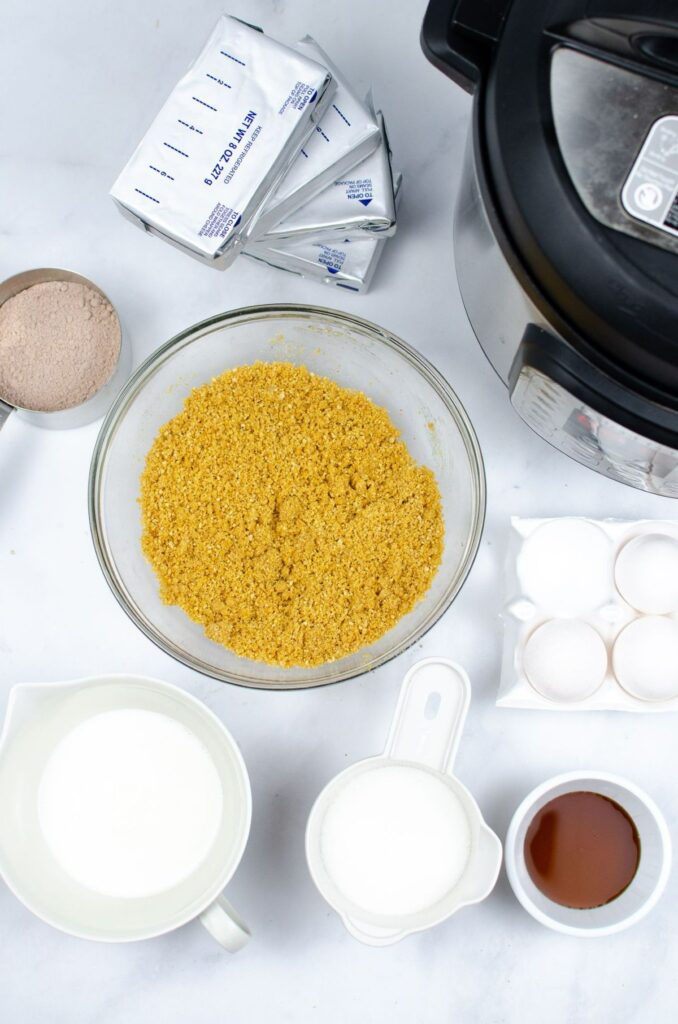
- CREAM CHEESE: Any brand will do, this is what gives our cheesecake it’s creamy consistency.
- CAKE MIX: A box red velvet cake mix is used for this recipe, it makes it so quick and easy.
- HEAVY CREAM: Again, this adds to the rich decadent flavor of the cheesecake.
Equipment Needed
- KitchenAid Classic Mixing Bowls
- OCTAVO 5 Speed Hand Mixer Electric
- Springform Pan
- Instant Pot
- Measuring Cups and Spoons
How to Make Red Velvet Cheesecake Recipes
These are the basic steps for making red velvet cheesecake recipes. Please refer to the recipe card below for more detailed instructions.
STEP 1: Mix
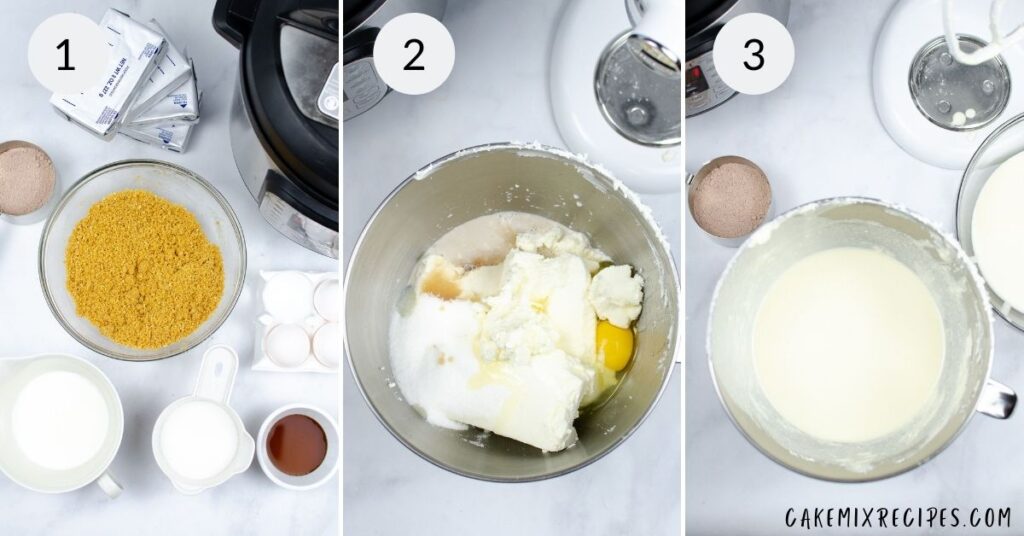
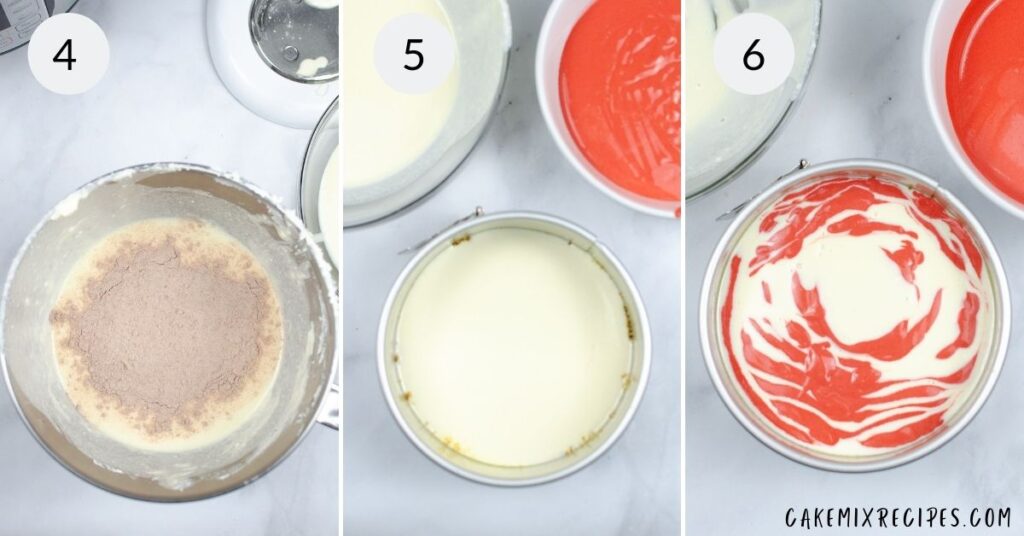
Begin by mixing together your cream cheese, eggs, vanilla, heavy cream, and sugar. Second, take your cheesecake mixture and divide the batter into two. In one of the bowls of the cheesecake batter, add in your red velvet cake. You can also add in your red food coloring if you want to make it a brighter red.
STEP 2: Crust
Place parchment paper on the bottom of your spring pan. Spray lightly with cooking spray. Pour half of the graham cracker mixture on the bottom of your spring pan mold. Push down well to flatten the graham crackers with your fingers, or the back of a spoon.
STEP 3: Alternate Mixture
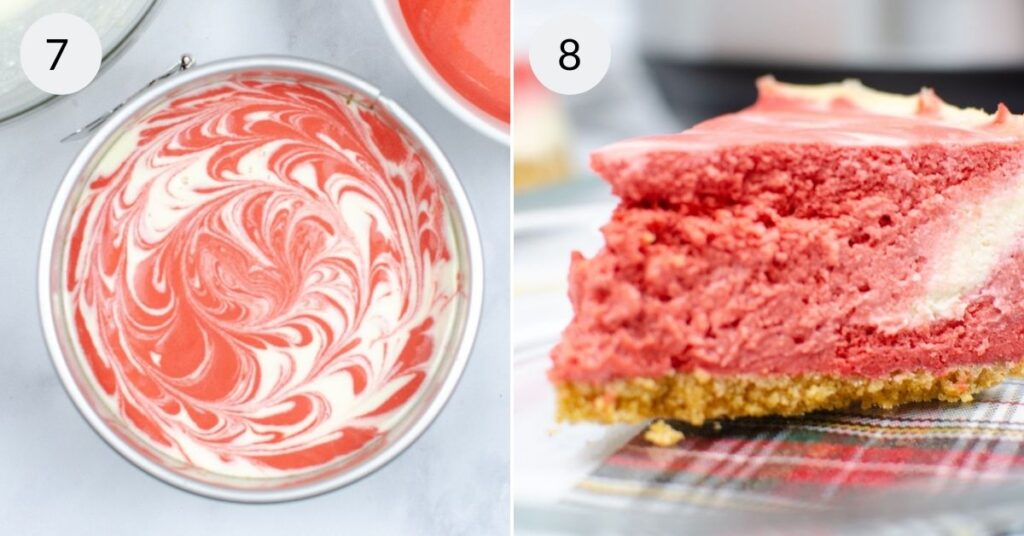
Then add your white cheesecake mixture to the top of your graham crackers about halfway up your pan then take 1/4 cup and add the red velvet cheesecake mixture to the middle of your cheesecake. Continue to alternate until you have filled your spring pan mold.
STEP 4: Swirl and Bake
Next, taking a knife, create a clockwise circle creating swirls moving toward the outside of the pan. Also add 1 1/2 cups of water to the bottom of your Instant Pot. Once water is in, place your cake pan on the trivet. Finally, cook on High Pressure for 45 minutes. Once completed, allow a natural release for 5 minutes. Lastly, transfer and cool in the fridge for at least 5 hours, or overnight.
Prep and Storage Tips
HOW TO MAKE THIS RECIPE AHEAD OF TIME
This Instant Pot cheesecake recipe should be made at least a day in advance so that the cake has the proper time to cool and set.
HOW TO STORE THIS RECIPE
You can store your cheesecake in an airtight container in the fridge for up to 3 days. Containers such as this are ideal.
HOW TO FREEZE THIS RECIPE
Freeze in an airtight container for up to three months. Thaw in the fridge.
Frequently Asked Questions
There are several variations to make this cheesecake a little healthier. You can use a greek yogurt cream cheese to make this cake. You can also use your favorite sugar substitute in place of the regular sugar in this recipe and utilize a low sugar or sugar free cake mix.
Indeed, you can use a cookie base. For example, red velvet oreos, shortbread or other cookies as your base layer for the cheesecake.
Of course, to have the cake blend together easily and correctly it is always best to start with room temperature ingredients.
Overmixing. While cheesecake should be mixed with a hand mixer, mixing it too much will result in a super soft cheesecake. To help your cheesecake keep its form, never mix longer than the recipe instructs and avoid tools like a blender or food processor.
Expert Tips for Making This ultimate red velvet cake cheesecake Recipe
- Add chocolate chips: Chips add that little hint of surprise to the cheesecake, white or dark works.
- Sour Cream: Feel free to add sour cream to have a little tang to your instant pot cheesecake, use about 1/3 cup.
- Springform Pan: Allows the cake to come out of the pan so easily, therefore use one that fits in your instant pot.
- Toppings: Sprinkles, melted chocolate or crumbled cookies make a great topping for these cheesecakes.
What to Serve with Instant Pot Cheesecake Recipes
- Ice Cream
- Whipped Cream
- Mocha Cappuccino
Did you try this recipe?
⭐ Click below to leave a review and rating! ⭐
Red Velvet Instant Pot Cheesecake
Equipment
- Springform Pan
- Instant Pot
Ingredients
- 4 8- oz cream cheese
- 3 large eggs
- 1 TBSP vanilla extract
- ½ cup heavy cream
- ½ cup sugar
- ½ cup red velvet cake mix
- optional red food coloring
- For the crust: divide in two
- 1 cup graham cracker crumbs
- 2 teaspoons granulated sugar
- 4 tablespoons unsalted butter melted
Instructions
- Mix together your cream cheese, eggs, vanilla, heavy cream, and sugar.
- Take your cheesecake mixture and divide the batter into two.
- In one of the bowls of the cheesecake batter, add in your red velvet cake mix. You can also add in your red food coloring if you want to make it a brighter red. Mix well.
- Mix together your graham crackers, sugar, and melted butter.
- Add parchment paper to the bottom of your spring pan. Spray lightly with cooking spray. Add half of the graham cracker mixture to the bottom of your spring pan mold. Push down well to flatten the graham crackers with your fingers, or the back of a spoon.
- Add your white cheesecake mixture to the top of your graham crackers about halfway of your pan. Take 1/4 cup and add the red velvet cheesecake mixture to the middle of your cheesecake. Take 1/4 cup and add the white cheesecake mixture to the middle of your cheesecake. Continue to alternate until you have filled your spring pan mold. (For the second cheesecake, add the red velvet cheesecake mixture first, then ¼ cup white cheesecake, etc.)
- Taking a toothpick, chopstick, or knife, starting from the center, move outward toward the pan creating straight lines. Once you have done this, start from the center and create a clockwise circle creating swirls moving toward the outside of the pan.
- Add 1 1/2 cups of water to the bottom of your Instant Pot.
- On the side, place your trivet on a flat surface. Place your cake pan on the trivet. Carefully, transfer the trivet to the inside of the Instant Pot.
- Close the lid on your Instant Pot and close the sealing valve.
- Cook on High Pressure for 45 minutes. Once completed, allow a natural release for 5 minutes.
- Carefully remove the trivet inside the Pot using the trivet handles with hot pads or a towel. Transfer and cool in the fridge for at least 5 hours, or overnight.
- Remove from the fridge when ready to serve!
Expert Tips
- Add chocolate chips: Chips add that little hint of surprise to the cheesecake, white or dark works.
- Sour Cream: Feel free to add sour cream to have a little tang to your instant pot cheesecake, use about 1/3 cup.
- Spring Form Pan: Allows the cake to come out of the pan so easily, therefore use one that fits in your instant pot.
- Toppings: Sprinkles, melted chocolate or crumbled cookies make a great topping for these cheesecakes.
Estimated Nutritional Information
The nutritional information provided are estimates. To learn more about how I calculate this information go to www.itisakeeper.com/about-its-a-keeper/privacy-disclosure-policies/
This recipe is my personal adaption of an ethnic inspired recipe. It is not intended to be an authentic recipe. I’ve recreated this recipe because I enjoy the flavors and I want to encourage my readers to expand their tastes and try new flavor combinations. The recipe, ingredients and processes may have been adapted to make the recipe accessible for the average American. I have provided links to authentic versions of the recipe in the post above. I encourage you to visit these pages and learn more about the traditional version(s) of this recipe.

